Polymer Clay Fan

Free Sculpting Tutorials

Search Results

Cigar Ashtray Sculpting Trick

Posted by goregt On August - 11 - 2011

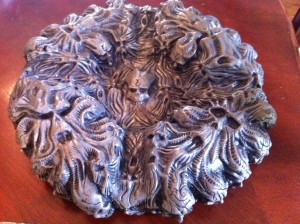
Skull cigar ashtray

For the most part I live a very healthy lifestyle, I’m in the gym six to seven days a week, eat very clean (except for Saturdays) and rarely drink.  I’m not oblivious to the fact that most people will probably find me to be a pretty boring person but hey I am what I am.  However, that being said one of the vices in my life is that I like to smoke cigars.  I don’t get to smoke them often, at best only a couple times a week, but they are something I’ve come to really enjoy over the years.

I enjoy collecting different cigar accessories, for example lighters and cutters, however one of the key accessories that was missing from my collection was a cigar ashtray.  There are quite a few cigar ashtrays out there that have a good design but I have yet to find one that really grabs my attention.  One of the key advantages of being an artist is that if I’m unable to find what I’m looking for in the commercial market I can always create it myself.  I wanted an ashtray consisting of skulls and skulls so it was off to the workshop to begin my project. Read the rest of this entry »

Resculpting the Belly

Posted by goregt On September - 22 - 2009

The next phase in this project is to start fixing some minor issues that I had with the original belly. Basically the main issue is that in some parts the torso was too flat and needed to be pulled out more. I’ve already sculpted my belly button so I want to be careful that I do not mess up any of the details in that area.

I’ve broken down my steps below.

  1. Draw a line outlining the location of the sternum and the center line for the belly.
  2. Add small balls of clay to bulk out the areas that need to be pulled out more. In this case I need to pull out the skin over the sternum, the portion of the belly above the belly button and the sides of my figure.
  3. Blend the balls of clay into the base of the belly
  4. Smooth out with my finger Read the rest of this entry »

Sculpting Tribal Torso

Posted by goregt On July - 13 - 2007

I’ve made enough progress on the face at this stage where I can move on to the torso.  Initially when I started this sculpture I only had plans to build a bust (sculpture from the waist up).  However, after working on it for some time I decided to do a full figure instead.  The reason why I am pointing this out is because I did not build an armature for this sculpture that would support an entire figure.  So for the next couple of lessons I will be sculpting this piece as if it were going to end up as a bust and then will switch to doing a full figure sculpture.

Ideally you will want to build out the armature for the full figure from the beginning since it will produce a better and more stable armature.  However, if you feel you need to take the design in a new direction there is no reason why you can’t.  The armature that I will use in the future post is not ideal for a full figure but it will work for this piece and will allow me to make the changes in the direction of my vision.

* This sculpture is created with Super Sculpey.

Read the rest of this entry »

Angel & Demons – Starting the Demon

Posted by goregt On February - 6 - 2012

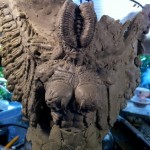
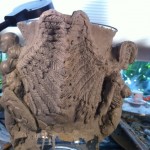
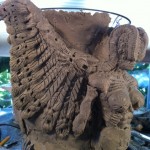
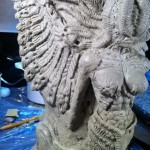
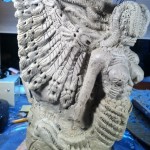
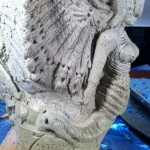
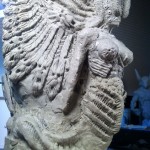
Now that I have the angel underway the next step is to start sculpting the demon.  My goal here was to create a figure that was very contrasting to the angel.  Since the angel is a very muscular male I wanted to create an opposing creature that was not only female but also composed of an unfamiliar form.  Everything is still very rough at this stage but once I start cleaning up the sculpture I think it will all work out well.

** You can also see how the wings will merge together in some of the pics.

Changing the Torso

Posted by goregt On September - 14 - 2009

There is a magic word that applies to a lot of the elite sculptors and one that I personally believe every artist, sculptor or not, should become familiar with. It is one of those words that could undoubtedly help you become a very talented and skilled artist. For those artist out there that are already very skilled in their craft, it will help you improve your skills that much more.

The magic word that I am talking about is persistence. The reason why persistence is important for artist is because those that sincerely choose to be persistent in perfecting their craft really never give up at improving their skills. For example, if you have a hard time sculpting hands the key is to keep working and improving your skills until you can successfully and easily sculpt hands. No matter how many hours it takes and no matter how many times you have to start over you never quit until you can successfully reach your goal.

So where am I going with all of this? Basically the sculpture in this tutorial has been sitting on a shelf unfinished for over two years now. I’m now working on it again however, as one would expect, my skills over the last couple years have grown and I can now see a lot of things that I need to change with this sculpture. One of the main issues that I have with this piece is the shape and the design of the breast. I never really liked my original design for the breast and although I had spent countless hours on this sculpture I always knew it would be something that I would have to revisit at a later date. The problem is that in the original design they look augmented to me, they almost look as if they have no weight to them.

I’ve been working on resculpting the breast and over the next few tutorials I will walk you through how and why I did the design changes. What is not shown in the pictures in the upcoming tutorials is the amount of time I invested in learning how to sculpt just one breast. Now I have sculpted the female form before but as of this writing Indigenous Allure is my only nude. All of my other female sculptures have something covering their breast and although the design was not easy it was more simplified than sculpting a nude form.

I’m not going to lie, I’ve really struggled sculpting the breast on this figure. I’m not sure what the problem is, it is just a design that I have personally found challenging. I spent over two days on just one of the breast alone and through a lot of persistence have gotten the shape down to something that I am comfortable with. The hours that I have invested in sculpting just the first breast has helped me already improve my skills. The second breast, which will be demonstrated in the next tutorial took a fraction of the time to complete.

Don’t get me wrong, it is awkward for me to write an article on my difficulties for sculpting breast. However a few years ago I could have written the same article about my challenges when trying to sculpt hands or even hair. The point is that this is one of my areas of weaknesses today. However I know this is also an area that I can not only learn to master but also use to improve my overall sculpting skills. The key is to keep working at the design until I get it right. Whether it be two days or two months the key is to keep at the design until it clicks and eventually becomes easy for me. As I already stated my second attempt, although still under construction, was much easier than the first. I still have a long ways to go but my sculpting speed has already improved along with the way that I even look at the design. As much as I wanted to quit I stayed focus on my task and in the end I think that I will end up with a sculpture that I am happy with.

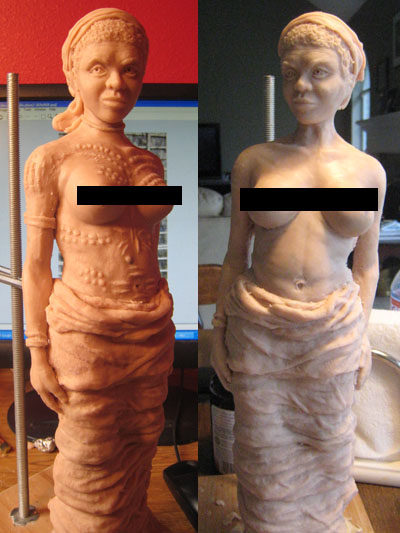
I’ve included some before and after shots of my sculpture (the design is still a work-in-progress and completed pics will be included at a later date). The uncensored pics are included in the link at the bottom of this page. Also the scars were removed to resculpt the torso, they are added back in a later tutorial.
Uncensored pics here.

Next lesson – Sculpting the Breast – 1

Previous lesson – Tribal Scars

Back to Indigenous Allure home
Polymer Clay History

Posted by goregt On September - 9 - 2009

What is Polymer Clay

Polymer clay is a material you can sculpt. It is based on polymer polyvinyl chloride (PVC) material. It usually contains no clay minerals and is only called “clay” because its texture and properties resemble mineral clay. Polymer clay is sold in craft, art and hobby stores. It is used by artists, hobbyists and children.

All polymer clay brands include PVC and one or more liquid plastic. Pigments may be added to the base to create colors along with small amounts of kaolin or white china clay. Mica may also be added to make a metallic looking clay.

Read the rest of this entry »

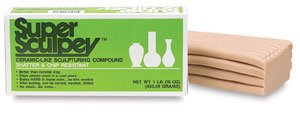
Super Sculpey

Posted by goregt On September - 8 - 2009

Super Sculpey

Out of all the polymer clays that I have used thus far Super Sculpey is by far my favorite. It is a huge improvement over the original Sculpey which in my opinion is way too soft for detailed sculpting. Super Sculpey offers the best of both worlds by being firm enough to sculpt a high level of details but also soft enough to manipulate the clay with ease.

If there is one disadvantage or downfall with Super Sculpey it is that the color has a tendency to make it harder to see things like fingerprints in the clay. The light beige color is translucent and after hours of sculpting it can put a strain on your eyes (or at least mine). There are ways around this and the easiest fix is to mix Super Sculpey with another colored polymer clay like Fimo or Premo. I’ve done this many times and the color that I like to best work with is a medium shade of gray. Gray is easier on my eyes and makes it to see all of the details, including the unwanted fingerprints. Read the rest of this entry »

Tribal Skirt

Posted by goregt On September - 1 - 2009

OK, first off my apologies. It has been a little over two years since I’ve updated this project so I’m having to go through old pictures to piece it back together. This is still an unfinished sculpture so I will try to schedule time to work on it in-between my current projects. The good news is that it shows the durability of polymer clay. You can set it aside for a couple of years and in most cases pick up from where you left off.

As I commented in a previous post, I initially started out planning only to create a bust for this figure. I ended up changing my mind along the way and decided to do a full figure instead. In order to make this work a makeshift armature was needed to build out the lower half of the sculpture.

Ideally the best case scenario is to build out the armature for the entire figure from the beginning but we do not live in a world of best case scenarios. My designs are usually dynamic in that they change throughout the sculpting process. This tutorial is a good example on how I like to try and figure out how to “make something work” even after the original plans have changed.

Read the rest of this entry »

FUSE Review

Posted by goregt On December - 8 - 2008

Recently I had put together a little article that outlines some of the key differences between sculpting with wax and polymer clays (http://www.polymerclayfan.com/sculpting-with-wax-vs-polymer-clay.htm). In hindsight, the review was more of a comparison between sculpting with Super Sculpey and a relatively new wax called FUSE. I think it is important to point out that not all polymer clays are created equal and the same case could be made for wax. As of the writing of this article, FUSE is the only wax I have ever tried so the chances are that my opinions regarding sculpting with wax could drastically change from one wax product to another.

Read the rest of this entry »

Detailing Fiddle Scroll

Posted by goregt On June - 4 - 2007

Detailing the Scroll

In our previous tutorial we started to build out the scroll on the fiddle. The base design for the scroll has been built and now it is is time to detail our fiddle’s scroll. I’m not going to fully complete the scroll by adding the keys yet but I do want to get the scroll where it is 95% complete. After this lesson, the fiddle really should look almost complete minus a few minor add-ons that will come later (keys, strings, etc).

What I like about the tutorials for the fiddle is they give a great example of how you can build a sculpture in stages. Instead of focusing on the entire piece you break it down into little individual projects. It is a lot easier to sculpt when you approach a project this way. The key is to focus on one small area at a time by trying to figure out how to create that one piece. Once figured out you then build it and then move on to the next little project. Repeat these steps several times and before you know it you have a completed piece.

Read the rest of this entry »

VIDEO

Enter the video embed code here. Remember to change the size to 320 x 270 in the embed code.

TAG CLOUD

Recommended Sites

About Me

Nothing special, just a self-taught sculptor having fun with my art and showing all of you the tips and tricks I use to create my own artwork

Twitter

    Photos

    Activate the Flickrss plugin to see the image thumbnails!